You don’t need a complicated design to make a meaningful baby card.
In fact, this easy baby card fun fold proves that when you let your Designer Series Paper do the work, you can create something soft, sweet, and special in minutes.
Why You’ll Love This Card Idea
There’s something about baby cards that makes you want everything to feel gentle and thoughtful.
But here’s the truth—when life gets busy, it’s easy to overthink the design… and then not make the card at all. That’s why this layout works so well.
It’s simple. It’s flexible. And it gives you permission to dive into your stash and create something beautiful with what you already have.
No hunting for the “perfect” supplies. No overcomplicating it.
Just paper, a sweet image, and a layout that lets it shine.
Why This Easy Baby Card Fun Fold Works
This layout is a quiet workhorse.
- It highlights your Designer Series Paper beautifully
- It creates interest without extra bulk, so easy to mail
- It works for any theme—not just baby cards
- It’s beginner-friendly but doesn’t look basic
And that little folded-back section? That’s where the magic happens.
Supplies Used
STAMPS: Made with Love (retired) or substitute your favorite set
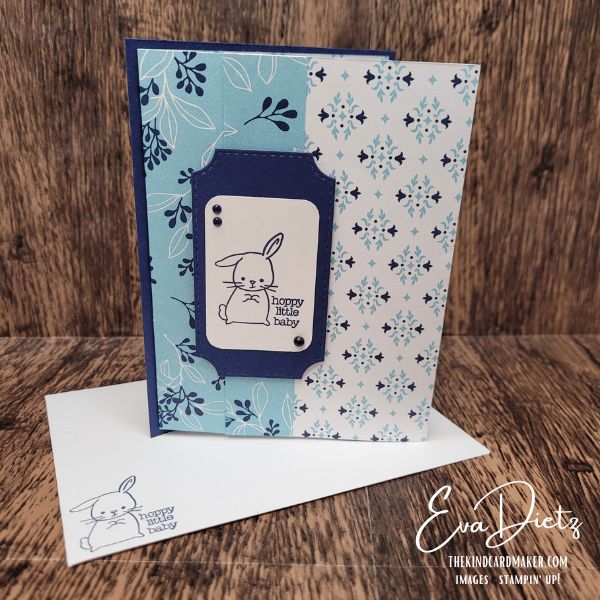
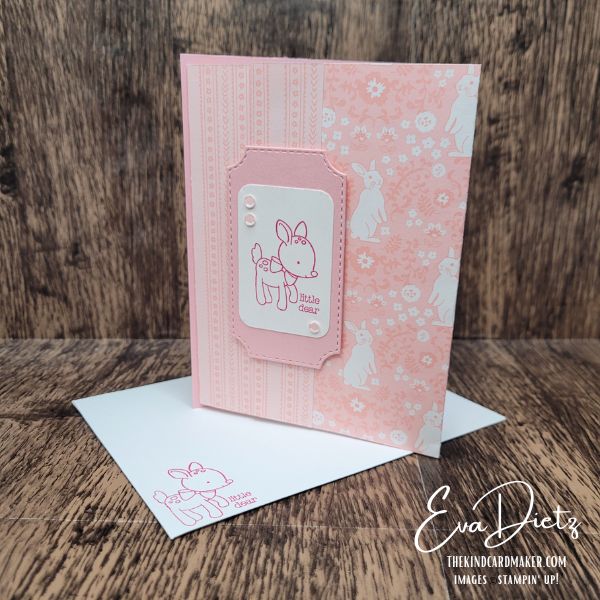
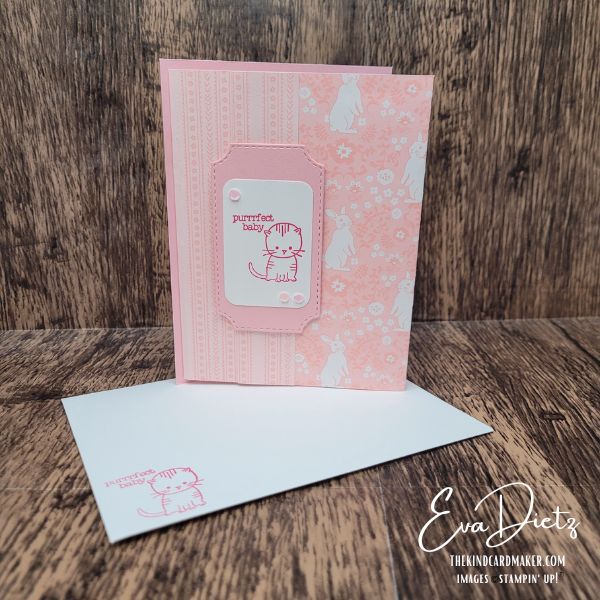
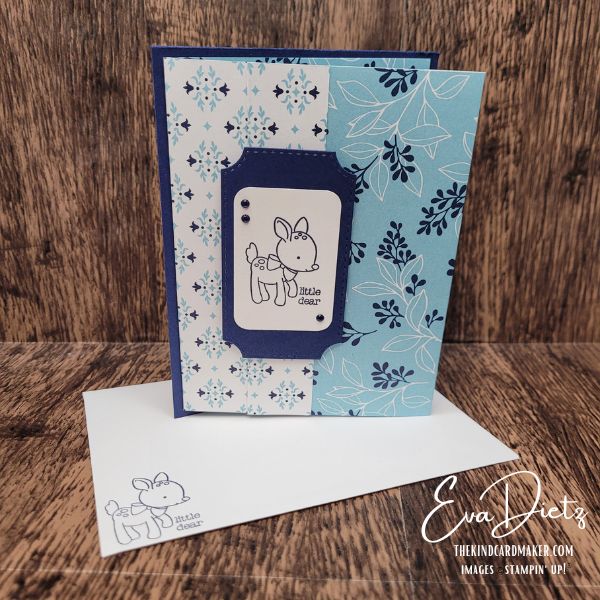
PAPER: Night of Navy Cardstock, Pretty in Pink Cardstock, Basic White Cardstock, Basic White Medium Envelopes
DESIGNER SERIES PAPER: Countryside Rose Designer Series Paper (DSP) (retired), True Blue Florals DSP (December Product of the Month)
DIES & PUNCH: Branching Out Dies and Rounded Rectangle Punch
INKS: Night of Navy, Melon Mambo
EMBELLISHMENTS: Pink Sequins (from a previous Paper Pumpkin kit) and Night of Navy Enamel Dot Essentials (retired)
ADHESIVE – Stampin’ Seal, Dimensionals
TOOLS – Clear Stamp Blocks, Paper Trimmer, Cut & Emboss Machine, Bone Folder, Take Your Pick Tool, Simply Shammy


Cutting Measurements
- Night of Navy or Pretty in Pink Cardstock 4 1/4″ x 5 1/2″
- Designer Series Paper (DSP) 5 1/4″ x 12″ then score at 1″, 4″, and 8″
- Basic White Inside layer 3 1/2″ x 4 3/4″ and Tag layer 2″ x 2 1/2″
- Cardstock (Night of Navy or Pretty in Pink) Die cut Layer 2″ x 3 1/2″
- Envelope Flap DSP 2 1/4″ x 6″ (trim after adhering)
Step by Step Assembly
- On the 4 1/4″ x 5 1/2″ cardstock, adhere the scored and folded last section to this cardstock piece.
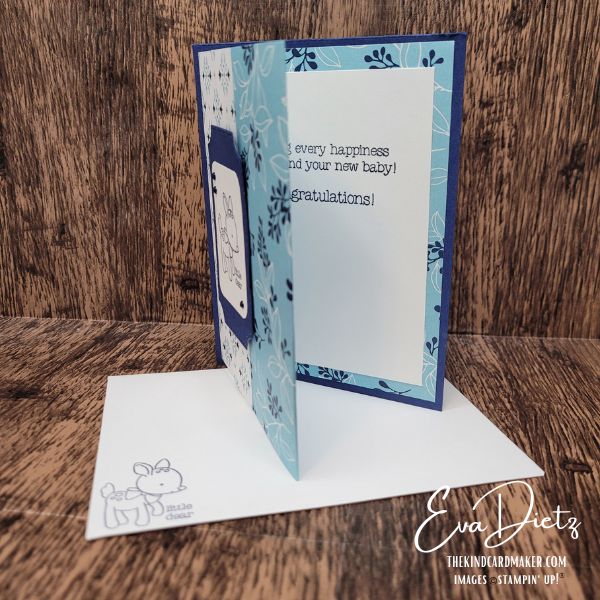
- Adhere the folded DSP 1″ section to the next front section, and then adhere that two step front section to the middle inner section. This will create a solid front panel so the card will stand like the photos show.
- With the Branching Out Dies (or your choice of dies) die cut the tag base.
- With the Rounded Rectangle Punch, punch the Basic White piece.
- Using coordinating ink to your card base color, stamp the animal image on the tag. Adhere both layers together.
- Apply Dimensionals to the finished tag and affix to the 1″ wide section of the front DSP.
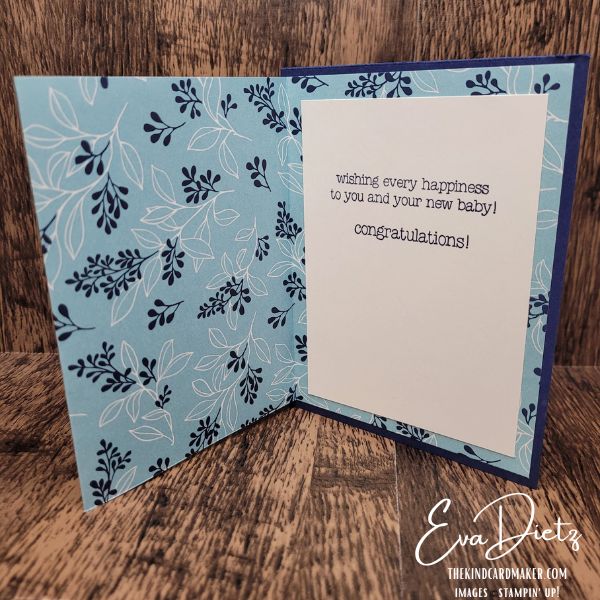
- Stamp the Basic White inner layer with matching sentiments. Adhere to inner card.
- Apply Embellishments to the tag portion.
- Finish by adhering the DSP to the envelope flap and trim off excess and stamp an image on the lower left front corner of the envelope.
Make It Your Own
This is where you can lean into your own creativity.
Try:
- Florals for Birthdays
- Neutrals for Sympathy
- Brights for Kids
- Seasonal papers for the holidays
Same layout. Completely different feel.
Final Thoughts
This card proves something important:
You don’t need more supplies—you need a layout you can trust.
Once you’ve made this once, you’ll start seeing it everywhere… and reaching for it when you need a quick, polished card that still feels special.
I’d love to hear how you’d use this layout in the comments!
💬 Would you keep it as a baby card—or switch it up for another occasion?
📌 Save this idea so you have it ready for your next quick card session.
📩 And if you enjoy simple, beautiful designs like this, be sure you’re on my email list for weekly inspiration.
Keep the Creativity Going
If you enjoyed making these cards, here are a few ways we can keep creating together:
Get more card ideas in your inbox
Join my Email List and choose a free card tutorial as my thank-you gift.
Try a monthly creative kit
Paper Pumpkin is a fun all-in-one crafting kit that shows up ready to create.
Looking for retired favorites?
Browse my Etsy Shop for retired Stampin’ Up! products and special crafty finds.
Shopping with me has perks
Orders of $50 or more earn Loyal Shopper Rewards toward a future crafting spree.
Some of the links above are shopping links to my Stampin’ Up! store. If you choose to order through them, I may earn a small commission at no extra cost to you — and I truly appreciate your support of my small business.
Happy crafting,


0 Comments