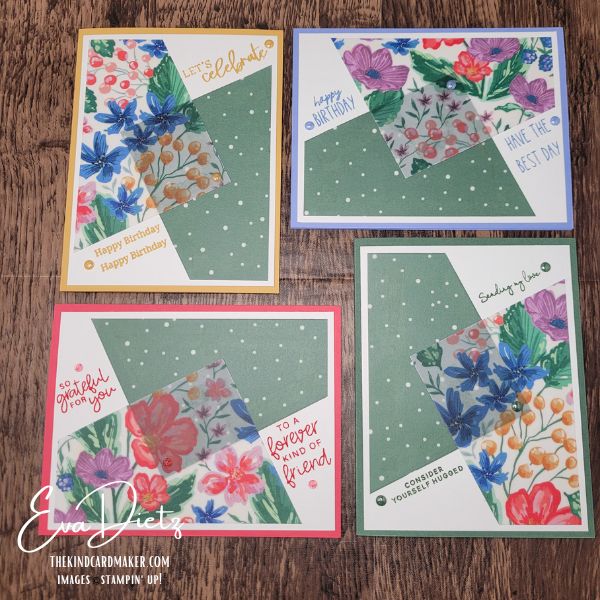
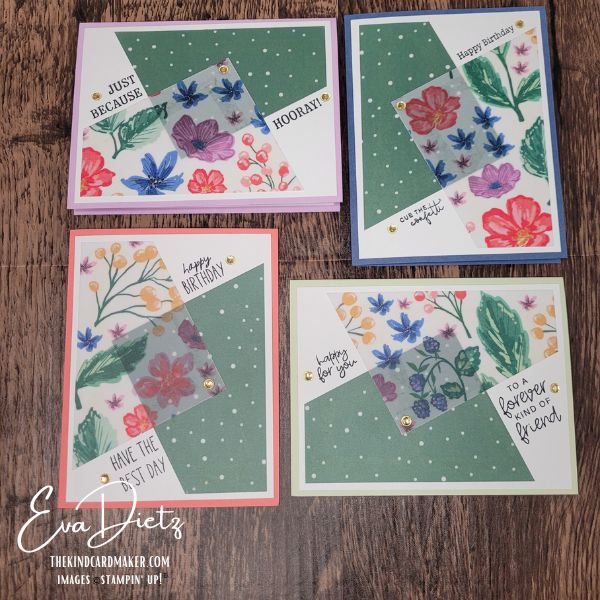
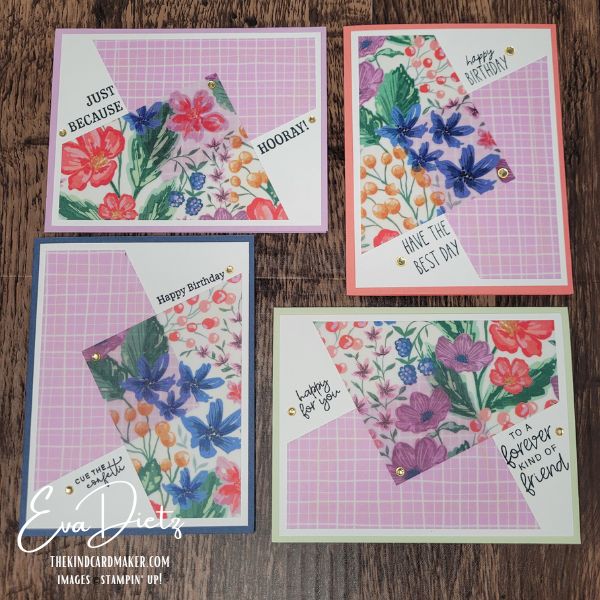
If you love making beautiful handmade cards quickly, today’s project is going to be a favorite! Creating 8 Berry Botanical Vellum Cards will become one of your favorite go-to card layouts.
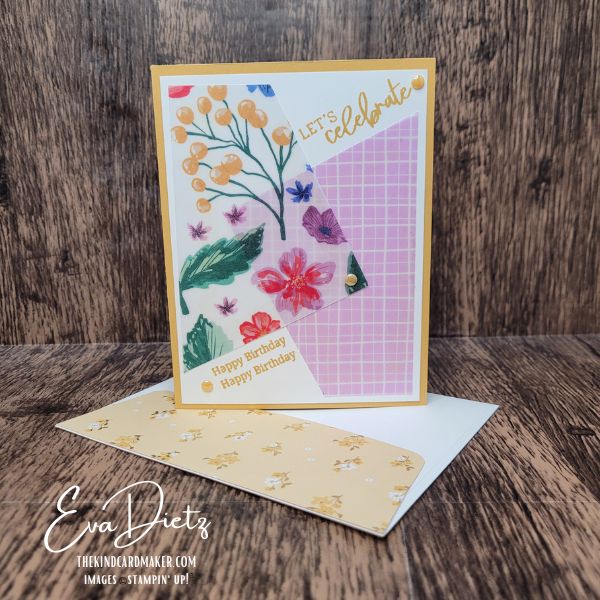
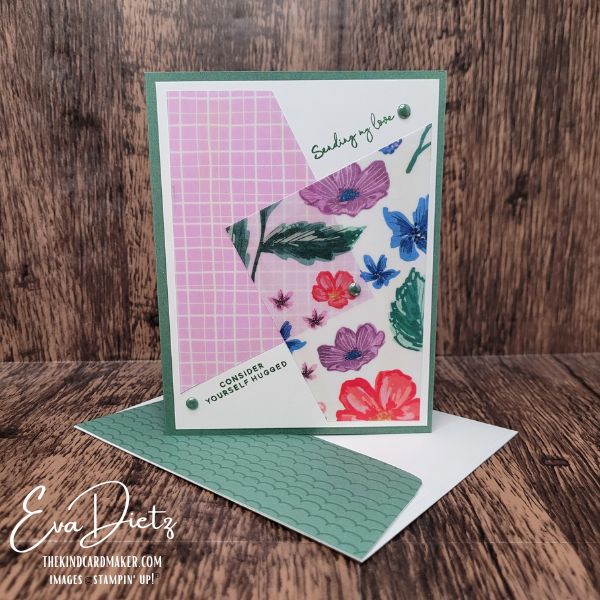
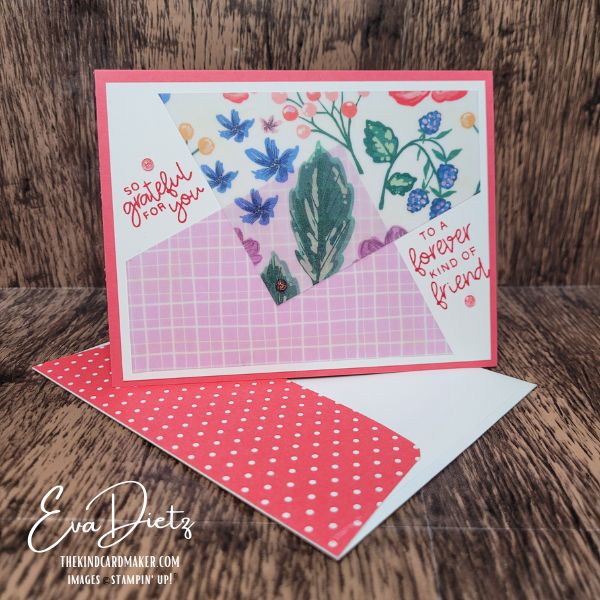
These soft floral vellum cards were created using the May 2026 Product of the Month — Berry Botanical Vellum — along with the gorgeous new 2026–2028 In Color cardstock collection from Stampin’ Up!
What makes this project especially fun is that each 6” x 6” vellum sheet creates TWO coordinated card layouts. With just four vellum sheets, you can make eight elegant cards that are lightweight, easy to mail, and perfect for birthdays, friendship cards, thank you cards, and encouragement greetings.
This project is also a wonderful way to stretch your supplies while creating a polished, boutique-style card set.

Why You’ll Love This Card Idea
- Makes 8 cards quickly
- Great for batch cardmaking
- Lightweight and easy to mail
- Uses only simple cuts
- Perfect for using greetings from many stamp sets
- Elegant without complicated techniques
Supplies Used
STAMP SETS
- Lily of the Valley
- Balloon Festoon
- Banner Sayings
- Cutest Crew
PAPER
- Berry Botanical Vellum (May 2026 Product of the Month)
- Strawberry Slush Cardstock
- Golden Glow Cardstock
- Hydrangea Hue Cardstock
- Peaceful Pine Cardstock
- Basic White Cardstock
- Bloom Boutique Specialty DSP for envelope flaps and inner card strips.
- Strawberry Slush 6” x 6” DSP (retired) for envelope flaps and inner card strips.
- Basic White Medium Envelopes
INKS
- Strawberry Slush
- Golden Glow
- Hydrangea Hue
- Peaceful Pine
ADHESIVES
- Stampin’ Seal and refills
- Non Stampin’ Up! – PLUS Permanent Vellum Glue Tape (very hard to find) or use 1/8″ Tear and Tape in small 1/4″ pieces
EMBELLISHMENTS
- 2026–2028 In Color Dots
- Strawberry Slush & Pretty in Pink Gems (retired)
TOOLS
- Paper Trimmer
- Bone Folder
- Pencil
- Take Your Pick Tool
Cutting Measurements
- Card Bases: Using one sheet of each In Color cardstock: Score lengthwise at 4 ¼” then cut crosswise at 5 ½”. This creates: Two card bases measuring 5 ½” x 4 1/4″ when folded in half and burnished with a bone folder.
- Basic White Cardstock: Cut 16 pieces from 4 sheets: 4” x 5 ¼” (One for the front layer and one for the inside layer of each card.)
- Envelope Flaps Cut: 2 ¼” x 6”. Use coordinating designer paper for decorative envelope flaps and for 1/2″ x 5 1/4″ strips.
How to Cut the Berry Botanical Vellum
Cut one 6” x 6” square from each of the four vellum patterns.


In first photo reference – Do the following 4 “dots” below on each vellum square:
- Measure 1 ½” from the top left corner and make a small pencil mark.
- Rotate the vellum 90 degrees.
- Repeat the same measurement.
- Continue until all four sides are marked.
Next, cut from mark to mark as shown in the second photo.


In the third photo place one half piece in paper trimmer as shown, cut from top tic mark down. Repeat with other half piece just like the first half was cut.
When finished, keep the same four pieces grouped together like a puzzle so they are easier to pair while assembling your cards.
This simple cutting method creates beautifully angled pieces that can be mixed and matched into both vertical and horizontal layouts.
Step by Step Assembly
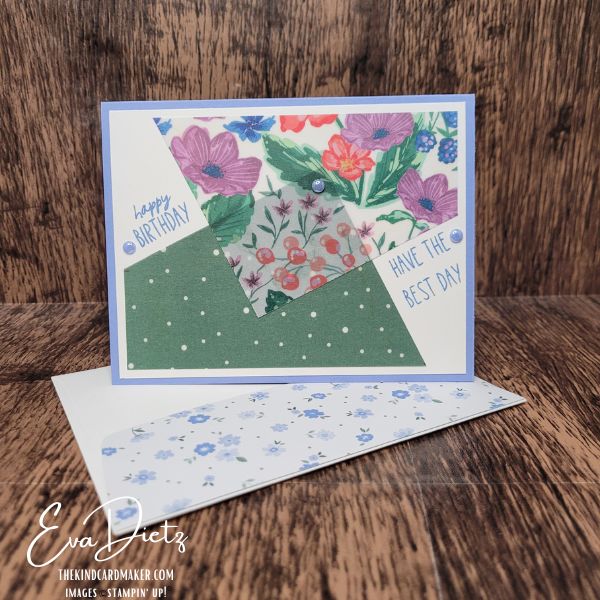
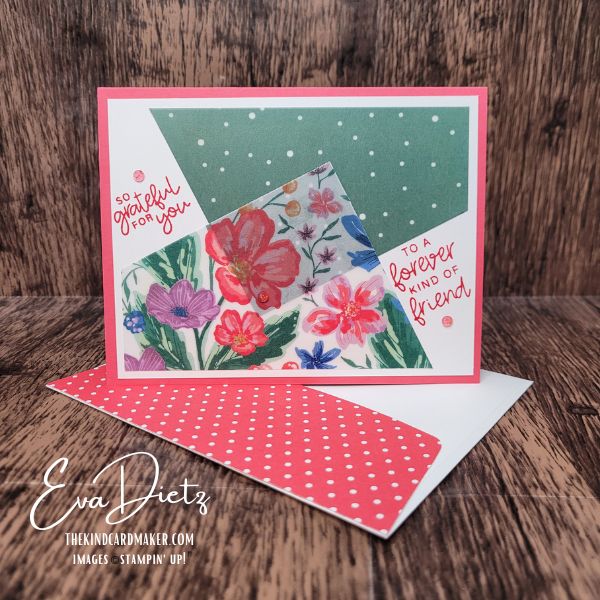
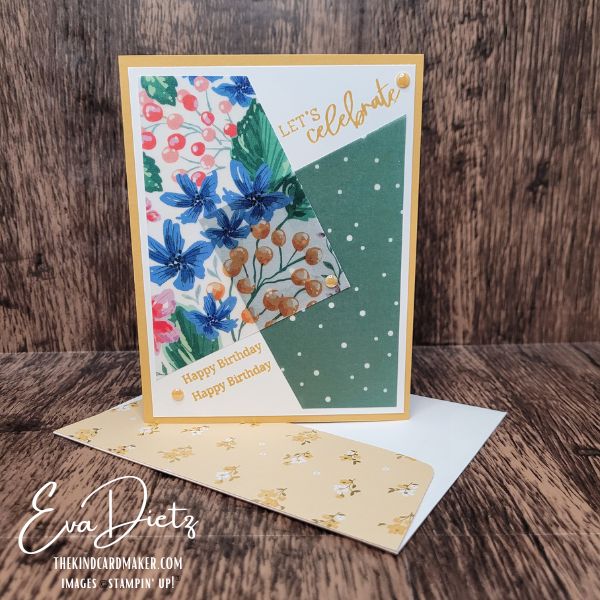
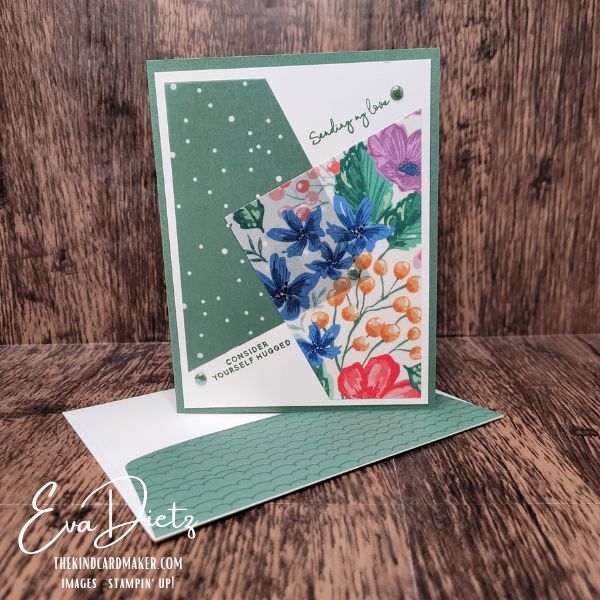
- Arrange two vellum pieces onto one Basic White layer. Create a mix of 2 Vertical card layouts and 2 Horizontal card layouts. Refer to photos. Slightly overlap the vellum pieces for added dimension and interest.
- Stamp greetings directly into the Basic White open spaces using coordinating ink colors.
- Adhere the completed front panel to the card base.
- Decorate the inside Basic White layer with a coordinating ½” DSP strip.
- Add embellishments to card front to finish the design.
- Adhere and trim the DSP for the Basic White Envelope to match.
Helpful Tips for Working with Vellum
- Use vellum adhesive behind layered sections whenever possible.
- Keep embellishments near overlap areas to help visually disguise adhesive.
- Stamp sentiments after arranging the vellum pieces so placement feels balanced.
- Create all eight cards assembly-line style for maximum efficiency.

Watch the Tutorial
Final Thoughts
Sometimes the simplest cardmaking ideas become the most useful projects in your craft room.
These Berry Botanical Vellum cards are soft, elegant, and incredibly versatile. Whether you need birthday cards, friendship cards, thank you cards, or encouragement cards, this easy layout can be customized endlessly with different sentiments and color combinations.
And best of all? You can create an entire coordinated card set in one crafting session.
That’s a win in my book.
If you enjoyed today’s project:
💬 Leave a comment and tell me which color combination is your favorite.
And remember…
Small handmade kindnesses can make a very big difference.
Below are 8 additional cards that I made on the You Tube Video linked above.
Keep the Creativity Going
If you enjoyed learning this technique and making these cards, here are a few ways we can keep creating together:
Download the free printable tutorial
Get a step-by-step version of this project you can save or print for later.
Get more card ideas in your inbox
Join my Email List and choose a free card tutorial as my thank-you gift.
Try a monthly creative kit
Paper Pumpkin is a fun all-in-one crafting kit that shows up ready to create.
Looking for retired favorites?
Browse my Etsy Shop for retired Stampin’ Up! products and special crafty finds.
Want to create these cards too?
I’ve put together a handy Shopping List so you can find the exact supplies from this tutorial in one place.*
*The products used in this project were available while filming the video and writing this blog post. If something does not show in the list, it is no longer available. Feel free to be creative and make your own substitutions from what you may have on hand.
Shopping with me has perks
Orders of $50 or more earn Loyal Shopper Rewards toward a future crafting spree.
Some of the links above are shopping links to my Stampin’ Up! store. If you choose to order through them, I may earn a small commission at no extra cost to you — and I truly appreciate your support of my small business.
Happy crafting,


0 Comments