If you’re anything like me, you probably have a growing pile of beautiful paper scraps that feel too pretty to throw away—but not quite big enough for a full card.
Today’s project is the perfect solution!
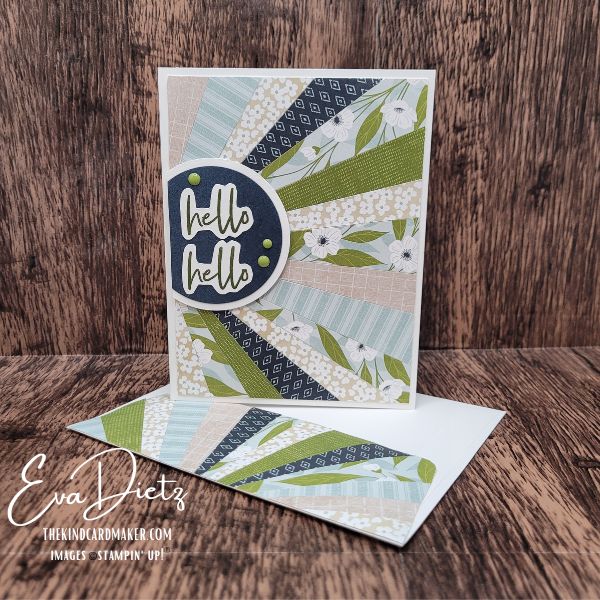
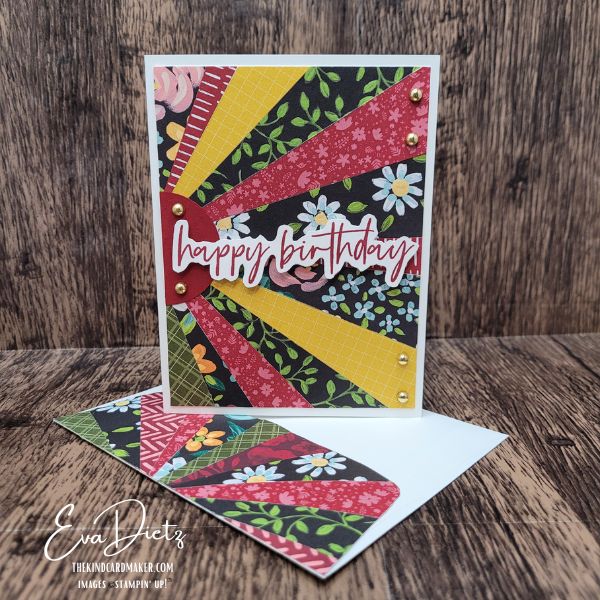
This scrappy sunburst card is a simple and satisfying way to turn those leftover pieces into something truly eye-catching. By arranging strips of patterned paper into a sunburst design and pairing it with a softly layered, fussy cut sentiment, you can create a card that looks polished and intentional—without needing a lot of supplies.
This is one of those designs that proves: simple can still be stunning.
Scrappy Sunburst Card Supplies Used
- STAMPS – Fabulous Sayings (was January 2026 Product of the Month – already sold out) substitute a similar stamp set.
- PAPER
- Basic White Cardstock
- Lovely Blossoms Designer Series Paper, Nature Walk Designer Series Paper (just the crumb cake grid pattern) (DSP)
- Secret Sea Cardstock
- Basic White Medium Envelope
- INK – Secret Sea
- PUNCH – 2 ¼” and 2 ½” Circle Punches (retired) substitute a size that works for the sentiment stamp set you selected. (Or if you have Circle Dies, use them.)
- EMBELLISHMENTS – Moody Palette Glossy Dots
- TOOLS –Paper Trimmer, Clear Stamp block D, Stampin’ Bone Folder, Seal Adhesive, Dimensionals, Take Your Pick Tool, Paper Snips, Simply Shammy.

Cutting Measurements
- Basic White Cardstock – 5 ½” x 8 ½”, 4” x 5 ¼”, 3” square, scraps for your sentiment
- Lovely Blossoms DSP & Nature Walk DSP (crumb cake grid only) – assorted patterns cut in strips ¾” x 5” and 1” x 5”, then each strip cut diagonally lengthwise
- Secret Sea Cardstock -3” square
Step by Step Assembly
- Score the 5 1/2″ x 8 1/2″ Basic White cardstock card base at 4 ¼” and fold using your bone folder.
- Before gluing anything down, arrange your patterned paper triangles on the 4” x 5 ¼” layer. This helps you balance colors and patterns for a pleasing overall design. Then slide triangle strips on to work surface.
- On the left side of the vertical 4” x 5 ¼” layer of Basic White make a small pencil tick mark halfway at 2 5/8”. This is the mark where you will adhere your first triangular piece of DSP with the tiny tip on the tick mark, referring to the photo. All tips of your triangles will meet side by side.
- Then using your laid out series of strips you will adhere the rest of the top section, then follow with the bottom section. (Compare to the photo below – different card used.) Continue until the layer is fully covered in your sunburst pattern.
- Flip the panel over and trim off the excess paper carefully with scissors for clean edges.
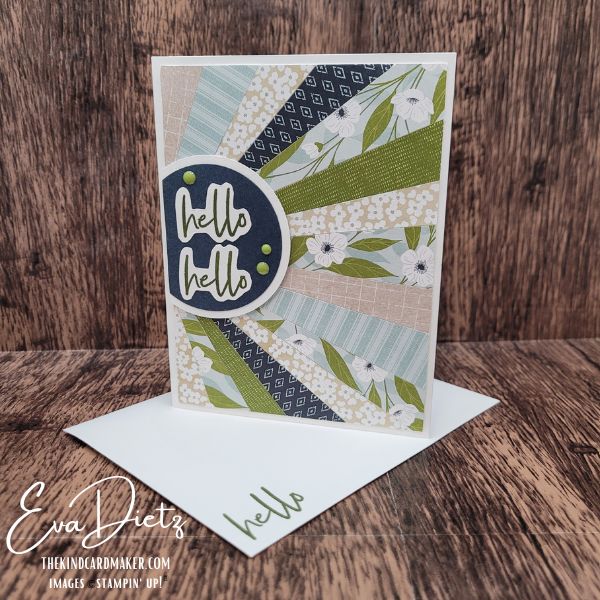
- Repeat sunburst process with the envelope flap and trim off excess paper.
- Punch out the two circles, the largest size in Basic White, and the next largest in Secret Sea. Adhere them together. Using the scrappy panel layer as your guide, Hold the circle over the left edge of your panel and trim off about ½” so it aligns neatly with the layers edge.
- Now adhere the scrappy sunburst layer to the card front (flat, no dimensionals).
- On a scrap of Basic White, flip over the photopolymer sentiment stamp and trace it twice. Then fussy cut out both shapes. Flip the paper over and stamp the sentiment in Secret Sea ink on each prepared shape. Also stamp the sentiment in the lower corner of the envelope front. Adhere the two sentiments flat inside the circle referring to the photo. Add Dimensionals to the circle combo and align with the left edge of the scrappy layer, affix. Add the glossy dots for dimension and interest.
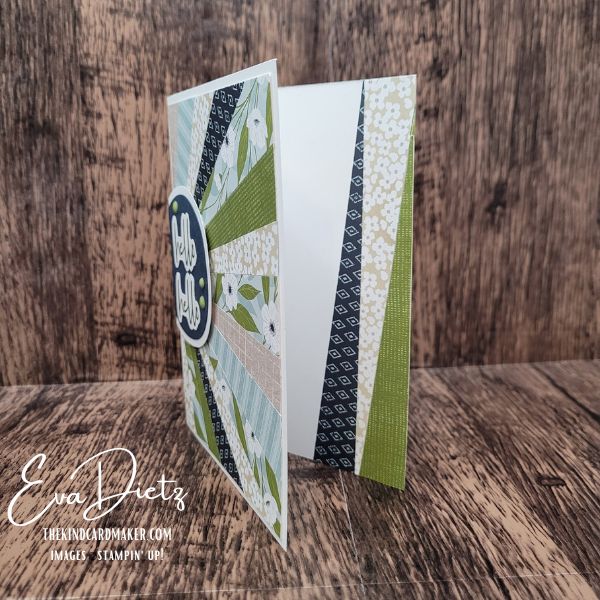
- If you have some scrappy triangles left add a few to decorate the inner right side of the card base.

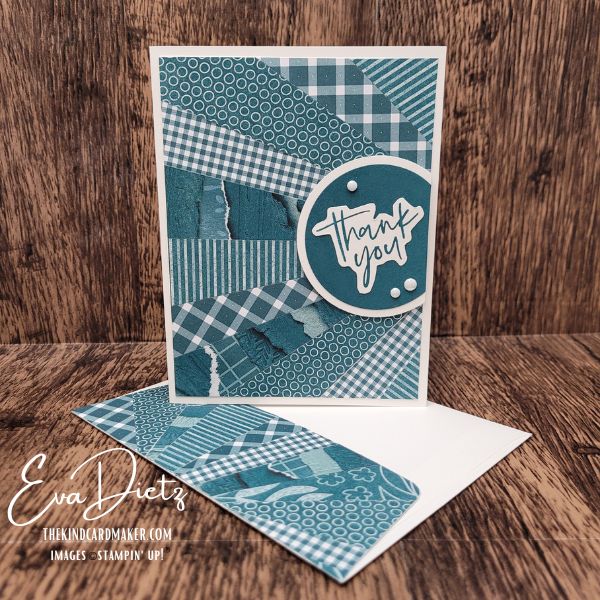
Variations to Try
This is where this design really shines!
- Use monochromatic scraps for a more subtle look
- Try bold, high-contrast patterns for a dramatic effect
- Swap the circle for a label or rectangle focal point
- Change the sentiment to make it birthday, thank you, or sympathy
No matter what you choose, each card will be completely unique. Here are two other occasions examples to inspire you.


Video Tutorial for Visual Learners
Prefer to see it in action? Watch the full step-by-step tutorial below. Please subscribe to my channel and click the bell to be notified when I upload a new video!
Questions about Fussy Cutting?
If you’ve ever felt unsure about fussy cutting—or if your hands get tired or sore while doing it—you’re not alone.
I’ve created a few short videos to help make fussy cutting easier, more comfortable, and more successful:
Episode 48 – How to Fussy Cut Your Sentiments
(This one is a great place to start if you’re newer to fussy cutting.)
Episode 50 – Easier Fussy Cutting (Including what helps my hands)
(If your hands get tired or sore, this one will really help.)
Episode 51- More Fussy Cutting Tips for Better Control and Comfort
(Even more support shared for hands that get tired or sore.)
In these videos, I share simple techniques, helpful tools, and a few personal tips that have made a big difference for me—especially as I navigate osteoarthritis in my hands.
My goal is to help you continue creating with confidence and comfort.
Final Thoughts
This is one of my favorite kinds of cards—the kind that uses what you already have and turns it into something beautiful.
It’s simple. It’s satisfying. And it’s a wonderful reminder that creativity doesn’t require more… just a fresh perspective.
So the next time you’re tempted to toss those scraps, give this design a try instead.
You might be surprised at what you create.
Keep the Creativity Going
If you enjoyed learning this scrappy technique and making these cards, here are a few ways we can keep creating together:
Want more ideas like this?
Grab a step-by-step version of this project you can save or print for later.
Get more card ideas in your inbox
Join my Email List and choose a free card tutorial as my thank-you gift.
Need supplies? Shop with me here:
I’ve put together a handy Shopping List so you can find the exact supplies from this tutorial in one place.*
*Most of the products used in this project were available while filming the video and writing this blog post. If something does not show in the list, it is retired and no longer available. Feel free to be creative and make your own substitutions from what you may have on hand.
Don’t Forget!
Orders of $50 or more earn Loyal Shopper Rewards toward a future shopping spree.
Love Happy Mail?
Check out the latest Paper Pumpkin kit. It is a fun all-in-one crafting kit that shows up ready to create.
Some of the links above are shopping links to my Stampin’ Up! store. If you choose to order through them, I may earn a small commission at no extra cost to you — and I truly appreciate your support of my small business.
You Might Also Enjoy
If you enjoy working with patterned paper, you’ll also love these fun fold card ideas.
https://thekindcardmaker.com/fun-tutorial-on-this-4-panel-valentine-card/
or https://thekindcardmaker.com/masculine-pinwheel-quilt-card/
Happy crafting,


0 Comments