How to Make a 2026 In Color Card Set
One of my favorite ways to stretch new products is to create a coordinated card set. Not only do you end up with multiple cards ready to send, but you also get to enjoy all the beautiful color combinations working together.
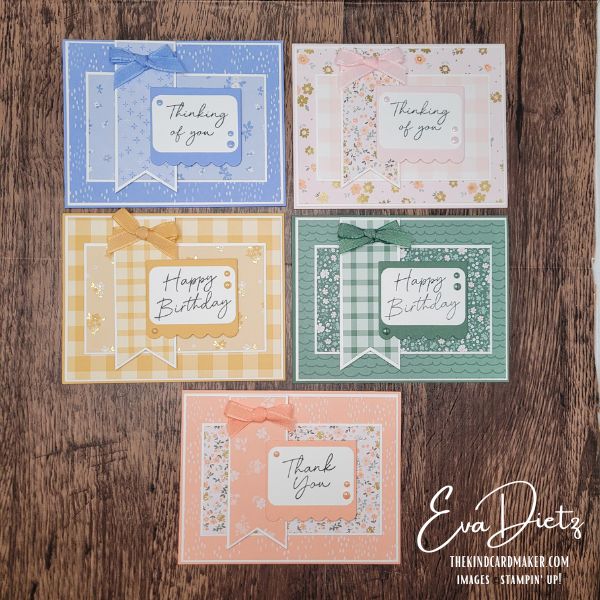
For today’s project, I used the brand-new 2026–2028 In Colors along with Bloom Boutique Designer Series Paper and Gingham Gallery Designer Series Paper to create a set of five all-occasion cards. Each card follows the same layout but showcases a different In Color, making this a wonderful project for gifts, craft fairs, or simply replenishing your card stash.
Why You’ll Love These Card Ideas
- Creates five cards quickly using one layout
- Perfect for assembly-line crafting
- Great way to showcase new In Colors
- Uses coordinating ribbon, embellishments, and designer paper
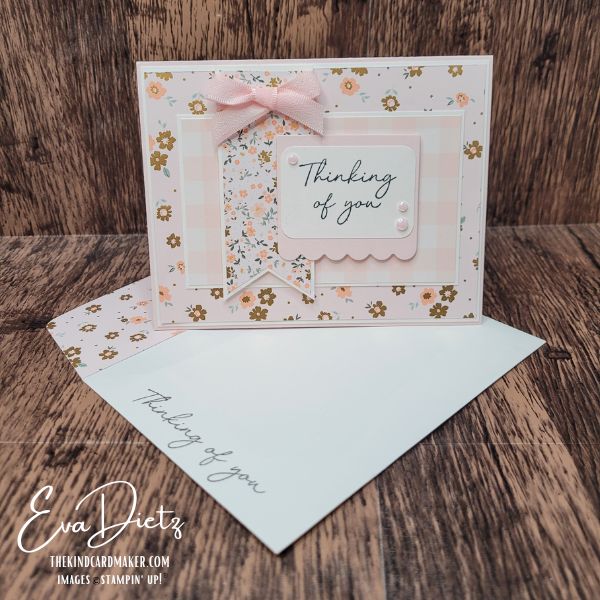
- Includes matching decorated envelopes
- Suitable for birthdays, thank you cards, and thinking of you cards

Supplies Used
Stamps
- Scalloped Blooms Stamp Set

Paper
- Hydrangea Hue Cardstock
- Peaceful Pine Cardstock
- Crisp Cantaloupe Cardstock
- Barely Blush Cardstock
- Golden Glow Cardstock
- Bloom Boutique Designer Series Paper
- Gingham Gallery Designer Series Paper
- Basic White Cardstock
- Basic White Medium Envelope


Ink
- Memento Tuxedo Black or your favorite black ink
Embellishments
- 2026–2028 In Color Ribbon
- 2026–2028 In Color Dots
Tools
- Rounded Rectangle Punch
- Triple Banner Punch (retired)
- Cut & Emboss Machine
- Scalloped Blooms Dies
- Paper Trimmer
- Bone Folder
- Clear Stamp Blocks
- Stampin’ Seal
- Dimensionals
- Glue Dots
- Take Your Pick Tool
- Simply Shammy
- Scotch Tape
- Scissors


Cutting Measurements: (Use Tutorial for detailed instructions.)
- In Color Cardstock: Card base 5½” x 8½”, scored at 4¼”
- Layer 1: Basic White: 4⅛” x 5⅜”
- Layer 2: Designer Series Paper: 4″ x 5¼”
- Layer 3: Basic White: 2¾” x 4½”
- Layer 4: Designer Series Paper: 2⅝” x 4⅜”
- Banner Layer 5: Basic White: 1½” x 5″
- Banner Layer 6: Designer Series Paper: 1⅜” x 5″
- Piece of Ribbon for Banner: 12″ long
- Sentiment Die Cut Layer 7: 2½” square
- Rounded Rectangular Punch Layer 8: 2″ x 2½”
- Card Inside Layer: Basic White: 4″ x 5¼”
- Card Inside Layer Strip of DSP: ½” x 5¼”
- DSP Envelope Flap: 2¼” x 6″


Assembly Instructions: (Use Tutorial for detailed instructions.)
Fold the card base and crease with a Bone Folder.
Adhere the large Basic White layer to the card front.
Add the coordinating DSP layer.
Attach the smaller Basic White rectangle.
Add the coordinating DSP rectangle.
Create the banner by punching or hand-cutting the banner ends.
Layer the DSP banner onto the Basic White banner.
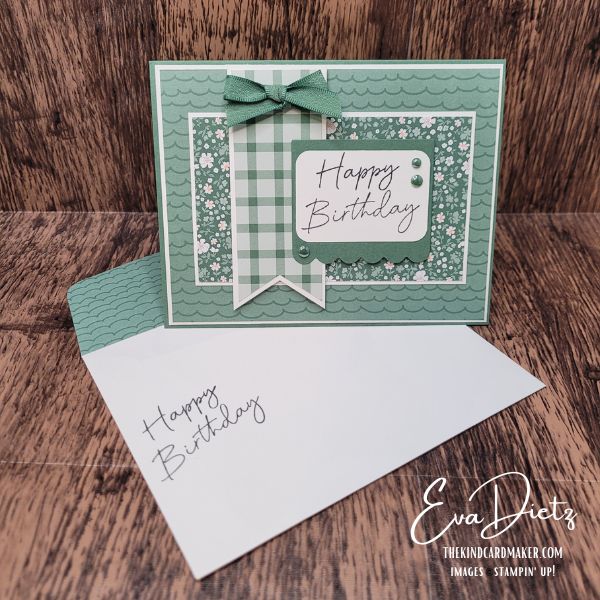
Tie a bow using coordinating In Color ribbon and attach near the top of the banner.
Pop the banner up with Dimensionals and adhere to the card front.
Die cut the scalloped sentiment layer.
Punch the Basic White sentiment layer.
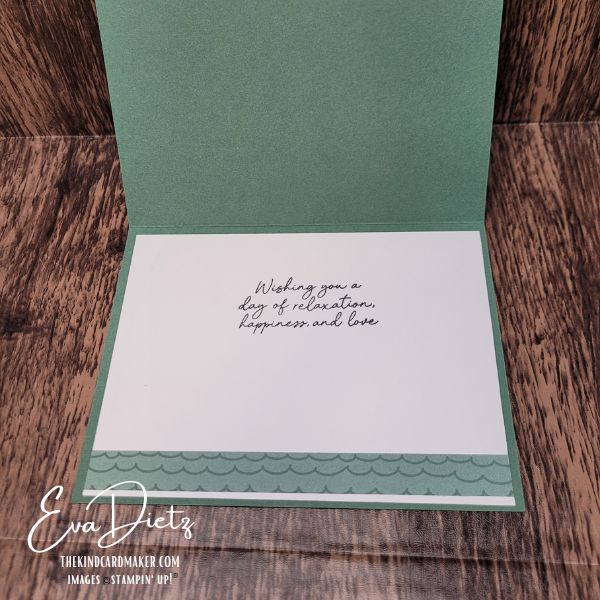
Stamp your greeting and coordinating inside sentiment.
Add the interior DSP strip and adhere the inside panel.
Attach the sentiment layer partially over the banner.
Finish with three coordinating In Color dots.
Decorate the envelope flap with matching DSP.
A Great Assembly-Line Project
What makes this project especially fun is that you can complete all five cards at once. Cut all the pieces, stamp all the sentiments, tie all the bows, and then assemble the cards in stages. This method saves time and creates a beautiful coordinated set that looks professionally designed.
Whether you keep the cards for yourself or package them as a thoughtful handmade gift, you’ll have a collection ready for birthdays, thank you notes, encouragement cards, and thinking-of-you moments.
Final Thoughts
The new 2026–2028 In Colors pair beautifully with patterned papers and simple layouts. By using one design and changing only the colors and sentiments, you can quickly build a card collection that is both practical and beautiful.
This is exactly the kind of project that reminds us that cardmaking doesn’t have to be complicated to be meaningful.


Keep the Creativity Going
Have a favorite from the five In Colors?
💬 Leave a comment and tell me which color you’d reach for first.
Download the free printable tutorial
Get a step-by-step version of this project you can save or print for later.
📩Get more card ideas in your inbox
Join my Email List and choose a free card tutorial as my thank-you gift.
Try a monthly creative kit
Paper Pumpkin is a fun all-in-one crafting kit that shows up ready to create.
Looking for retired favorites?
Browse my Etsy Shop for retired Stampin’ Up! products and special crafty finds.
🛍️ Want to create these cards too?
I’ve put together a handy Shopping List so you can find the exact supplies from this tutorial in one place.*
Dashboard
*The products used in this project were available while filming the video and writing this blog post. If something does not show in the list, it is no longer available. Feel free to be creative and make your own substitutions from what you may have on hand.
Shopping with me has perks
Orders of $50 or more earn Loyal Shopper Rewards toward a future crafting spree.
Some of the links above are shopping links to my Stampin’ Up! store. If you choose to order through them, I may earn a small commission at no extra cost to you — and I truly appreciate your support of my small business.
Happy crafting,


0 Comments