INTRODUCTION
As an expert in card making, I’m here to help you become a skilled beginner card maker quickly and effectively. Here’s a list of the most important things you need to know to master the art of beginning card making:
Card making is a creative and enjoyable craft where you design and create personalized greeting cards for various occasions or to express your sentiments to others. It involves combining different elements like paper, stamps, and embellishments to craft unique and heartfelt cards. I hope you’ll give it a try.
AS A BEGINNER CARD MAKER TRY AN ALL-INCLUSIVE KIT
There’s a very easy way to try Stampin’ Up! at first. It is through two options they offer.
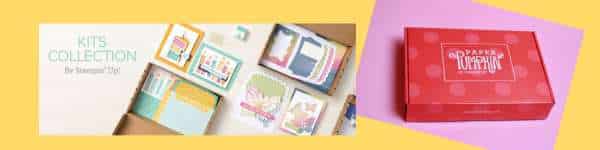
Kits Collection – All-Inclusive Kits that have everything you need
In the kit, you will find a clear stamp block, and a small ink spot to apply on the set of photopolymer (clear) stamps that come in the kit. There will be pre-cut and pre-scored materials (if you chose a card kit) or just the necessary materials, needed adhesives, any embellishments, and easy to follow directions. You might need to supply a pair of scissors in case there is twine to cut. If you chose a card kit, envelopes will also be included.
The best part is you keep the ink spot and stamp set to use again and again.
Paper Pumpkin – A monthly subscription craft box
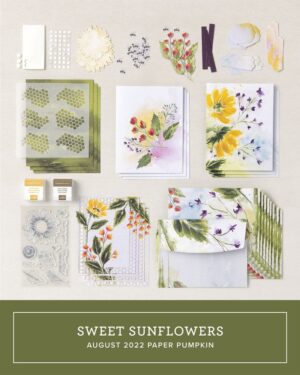
Every Paper Pumpkin Crafting Kit will bring you a lot of value each month. About 10 months of the year it is a card making kit that makes 8 or 9 cards, but twice a year there may be a set of treat boxes for Valentines or Halloween.
With your first kit you will receive a clear stamp block to use again and again. Each themed kit includes a theme-coordinated photopolymer stamp set (that you use the clear stamp block with), a matching color-coordinated ink spot, card bases that are pre-scored, matching envelopes, bling adhesive dots, embellishments, twine or ribbon, foam dimensionals and glue dot adhesives. You’ll find the How – to instructions on the opposite side of the backing board the kit is on.
When you are all finished with your projects, you still have the clear block, stamp set, and ink spot to use again for more creative projects.
All you will need to supply is a pair of scissors, a bottle of Tombow Multipurpose Liquid Adhesive, and some scotch tape occasionally.
If kits aren’t your thing, keep reading. Lots more to learn!
STEPS TO BECOMING A SUCCESSFUL BEGINNER CARD MAKER
Step 1: Familiarize Yourself with Stampin’ Up!s Basic Tools and Supplies That are Fundamental to Great Card Making
The necessary tools to have on hand to start are:
- Paper Trimmer – Cut’s the best and scores the best of any beginner trimmer I’ve used.
- Clear Stampin’ Block D – It is the most versatile of all the stamp blocks that you will adhere either a cling or photopolymer stamp to.
- Stampin’ Seal Adhesive – very sticky tape adhesive in a dispenser to add layers to your card.
- Dimensionals – A thin foam layer that will raise up layers on your cards.
- Simply Shammy – A cleaning pad that takes the remaining ink off your stamps.
- Grid Paper – A 11″x17″ grid paper to protect your work surface.
- Bone Folder – Helps with correctly folding your card base.
To start, the supplies you’ll need to build your cards are:
- Cling or Photopolymer Stamp Set – I recommend the Biggest Wish stamp set
- Note Cards and Envelope Set or Package or Basic White cardstock and Basic White Medium Envelopes
- Memento Tuxedo Black Ink and Refill bottle
After a period of time practicing your simple Stamps, Ink, and Paper cards, you will expand to incorporate one color and more tools.
- Clear Block I
- Real Red Cardstock, Ink and Ink Refill
- Paper Snips
- Baker’s Twine
- Mini Dimensionals
- Mini Glue Dots
- Stampin’ Seal Refill
- Tombow Multipurpose Liquid Glue
- Paper Trimmer Replacement Blades
Visit the Shopping Lists to purchase your tools and supplies as your budget allows.
Step 2: Standard Card Size
The typical card size American card makers use is an A2 card. An 8 1/2″ x 11″ sheet of cardstock cut in half either vertically or horizontally and score the fold in the middle of the two pieces and you have created yourself two card bases from the one sheet of cardstock. As you get more confident you will use your paper trimmer to cut proportional layers of a variety of papers to enhance the look of your cards.
Step 3: Principles of Design and Color Theory
Learn about design elements such as use of color, negative space, balance, symmetry, proportionality, and focal points. This knowledge will help you create visually appealing and harmonious card designs. Luckily, Stampin’ Up!s four Coordinated Color Families will help you make smart choices and help build your confidence in making good looking cards.
How you design and layout the elements on the card base is very important. Usually having one focal point is best, as it draws the eye in to see that image first before scanning the entire card. Play with colors but don’t go overboard. Stampin’ Up! has something called a Color Coach where they offer suggestions as to which colors go together the best and will look pleasing to the eye.
After you have done some design research, draw some sketches of how you would like your first cards to look using just the stamp set, ink, and paper from the initial products you purchased. Try to achieve a Clean and Simple (CAS) Style: Embrace the beauty of clean and simple card designs and allow your creativity to shine.
EAGER TO MAKE YOUR FIRST CARD, BEGINNER CARD MAKER?
Step 4: What is Inside the Stamp Set Case?
If you start with a Cling (red rubber) Stamp Set, you will see that the stamps come attached to the red rubber framework. You may punch out each stamp but do not throw the framework away. Helps you always know that you have all your stamps. The beginning you should make a habit of always putting your stamps back in their case and not let a pile of stamps lay around on your work surface. You will also see that there is a sheet of labels that show the stamp images on them. You will have to apply those labels to the foam side of the red rubber stamps Watch my video to show you how to apply the labels, plus learn a bonus tip from me. Watch This Video
If you start with a Photopolymer (see through) stamp set, you will see that the clear stamps are put between two sheets of plastic. One sheet is a little thicker than the other. The thinner sheet is the one that you can peel off, and then carefully peel off the stamp you need, leaving the rest of the images on the thicker plastic sheet. You will also notice that Stampin’ Up! has put the stamp images on the back portion of case itself.
Some Stampers like to put their stamps so they stick directly to the case itself and throw away those two sheets of plastic. I personally don’t like that, because I often print out images of card ideas from the Internet and I cut up the paper and stick those card ideas inside the case for future reference I don’t want the paper sticking to the face of the stamps so that’s why I keep them on the plastic. You can still refer to the images on the case to make sure you’ve got all your stamps but I also personally feel that they stick better to those little plastic sheets than they stick to the case.
Step 5: How to Place the Stamp on the Clear Acrylic Stamp Block
Sticking the Cling (red rubber) Stamp Set to a Clear Acrylic Stamp block is easy. Set the stamp on the grid paper with the label towards you and press the clear block down on the label. (If you used my hint from the earlier video you might also have a small piece of Washi Tape on your label, just make sure hardly any is hanging over the edge of the stamp. We don’t want that to touch the ink pad.
Sticking the Photopolymer stamp to a Clear Acrylic Stamp block is done by centering the image on the block, trying not to capture any air bubbles underneath the stamp.. Before placing the stamp in the ink pad, press the stamp/block combo on your grid paper several times. You will hear a sticky sound like the stamp is sticking to the grid paper but you are actually removing manufacturing residue each time you press the block/stamp to the grid paper. By doing this process of removing the residue 3-4 times, you will help ink adhere to the stamp to give you a clear stamped image on your cardstock.
Step 6: Opening the Ink Pad
If you are starting with my recommended Memento Tuxedo Black Ink pad, all you have to do is lift the lid/cover off. Start a good habit right now by turning the lid over on your grid paper so you see the edges of the lid, not the flat top. That way when the edges of the lid eventually get ink on them (that will happen!) you won’t accidentally be adding wet ink somewhere on your grid paper that you don’t want there
If you happen to be starting with a Stampin’ Up! Classic Stampin’ Pad, Watch This Video for how to open and close the (clamshell/compact style) ink pad without getting ink on your fingers and wax the sliding track with a birthday candle for smoother operation. Notice where to put your fingers and thumb so you won’t get any ink on your fingers. Many stampers are always getting inky and you don’t have to if you just practice opening and closing the ink pad a few times to get the feel of how they work.
Step 7: Process of Inking Up the Stamp Image
Plan to use your grid paper as a practice stamping area before trying to stamp on any Basic White notecards or Basic White cardstock card bases. Quick history lesson here – remember the old black cloth inkpads with metal cases that were used in business offices? Because those were cloth infused with ink, people tended to go SMASH, SMASH, SMASH on the ink pad before placing the stamp on the paper. You don’t need to do that with Stampin’ Up! Classic Stampin’ Pads!
Stampin’ Up! Classic Stampin’ Pads are made of foam soaked in ink, so they are quite juicy at the beginning, but with repeated use they do tend to need to be reinked more often. It is always a good idea to purchase the matching ink refill bottle at the same time that you buy the ink pad. That means NO smashing the stamp into the pad or you’re going to have ink everywhere, on your fingers, the stamp, the clear block and most likely on the paper in places you don’t want it to be.
My motto is go tap, tap, tap lightly on the ink pad using one hand, then turn the stamp over, looking to see that your image is fully covered in ink (not the entire stamp!). Then apply the stamp/block to the paper without any rocking it back and forth or side to side. (We don’t want any “halos” of ink going where it shouldn’t.) Often it is a good idea to grab the clear stamp block on each side with each hand so you can apply direct downward pressure. Making sure you DO NOT rock the block at all. I hold all my stamps to the paper with pressure for a count of at least one, two, three, then lift the clear block straight up and you should have a nice dark crisp image to be proud of.
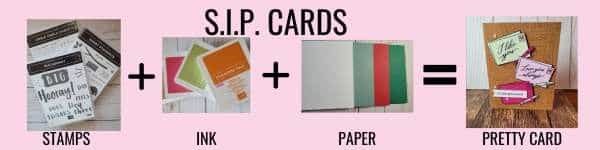
Once you are happy with your practice session on the grid paper, go ahead and stamp an image on your Basic White card base following all the tips you’ve learned so far. You just made your first S.I.P. Card! As your abilities grow, you will Infuse your personality and style into your cards. Handmade cards are unique and cherished for their personal touch.
Step 8: Cleaning Up After Stamping
If you are completely finished with that stamp, go straight to your wet Simply Shammy and wipe the stamp back and forth until it is clean. The Shammy will absorb the ink and never be fully clean ever again. But that’s ok. They can be rinsed out when you are all done stamping.
Make sure to close your ink pad. The last thing you want to have happen is drop your just stamped card into an ink pad and have to start all over!
Now you have two choices: 1) Will you put the stamps away one by one when you are finished with them (meaning peel them off their block and return to the stamp case clean), or 2) Will you leave all the cleaned stamps that you used on their blocks until you are completely finished with the card you are making? No matter which choice you make, once you have removed the stamps from their blocks, you need to wipe the blocks down too. Doing this cleaning step will once again keep any sneaky ink from ending up some place it should not. Cleaning up after each project will save you headaches down the road. Trust me on that!
Step 9: Finding a Home for Your Stamping Materials = Organization
Depending on what your living situation is you may just be working and stamping on your dining room table, or you may set up a card table in your family room, or you might have a extra bedroom you can spread out in, or if you’re really lucky you might have a basement that you can call your craft room. No matter what kind of space you have to stamp within you will need a system to keep your supplies organized.
Keep your crafting area organized and accessible. An organized space will boost your productivity and creativity. Some people organize by starting off with a covered bin they can take wherever they need. Some use a suitcase with wheels. Some take over a bookcase or a set of drawers. How you store your materials is up to you, but keep them together keep, them dry keep, and them out of the direct sunlight.
Step 10: Ways to Help Yourself Enjoy This New Adventure
- Practice Often: Like any skill, card making improves with practice. Don’t be discouraged if you make some mistakes. learn from them. View mistakes as opportunities to learn and grow.
- Be Patient with Yourself: Card making should be relaxing and stress-free. There are times when we know we should or shouldn’t be doing something, because we just don’t feel like it. That’s ok. Return when you feel ready to try again.
- You may feel overwhelmed or discouraged when you are starting out. I’m here for you to give you encouragement and support.
- Join Crafting Communities: Connect with other card makers through social media or local crafting groups. Sharing ideas and experiences can be invaluable. A community of stampers fosters creativity and support.
- Enroll in card-making workshops or watch online tutorials to learn start learning new techniques and gain inspiration from experienced crafters.
- There are many different resources available to help you learn how to make cards. You can find books, magazines, and websites that offer instructions and inspiration.
- Share what you have created with others. Share your cards with friends, family, and social media followers. Embrace constructive feedback and encouragement from others will motivate you to excel.
Bonus!
Take photos of your creations with your camera or smartphone. Create yourself a digital portfolio to trace your progress. Reviewing your previous work can showcase your growth as a card maker.
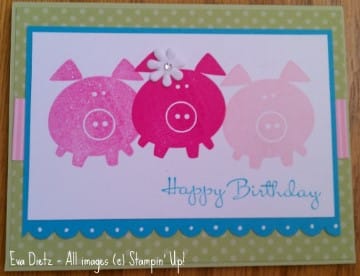
Three Little Piggies Card from when I first started as a demonstrator back around 2011.
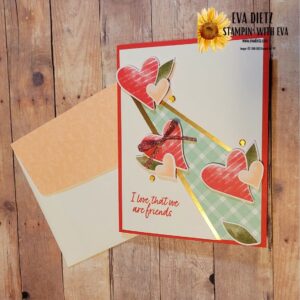
Valentine Card from February 2023
SEAL OF APPROVAL!
Card making is a creative and enjoyable hobby. Embrace the learning process, have fun, and find joy in the art of creating you very own handmade cards. Card making is all about unleashing your creativity and crafting heartfelt messages for your friends and loved ones. With a bit of practice and imagination, you will create beautiful and unique cards that will bring smiles to the faces of those who receive them.
With these fundamental aspects of card making I’ve shared, you’ll be well on your way to becoming a skilled card maker in no time. Enjoy your creative journey and have fun spreading kindness through your handmade cards!


0 Comments