INTRODUCTION
If you find that your handmade card creations lack a certain something, and you wish to enhance them but are uncertain how, you can acquire new insights and techniques right here!
Consider these recommendations to help make your cards POP!.
First, Do Your Research
You probably have acquired a number of stamp sets, but maybe you haven’t used some of them yet. By doing some research you can find inspiration in a wide variety of places.
Did you know Pinterest is a search engine? Start by searching the stamp set names you own, or card occasions. Pin those ideas to your boards. Or use your smartphone to take a photo of your desktop screen for future reference.
You can also snip the Pinterest photos and save them to your computer. I recommend saving those photos in organized files by Stamp Set name for easy reference and also rename the photos you save with the designer’s name, so you can give proper credit to that person who inspired your next card design.
You Tube Card Making Videos can be a great resource for quick and easy card ideas that POP! The people who make those videos often have links back to the personal website where you can print off a tutorial or save an image of the card.
Google your stamp set names and see what comes up. Visit the websites of those designers and either snip or “right-click and save as” their ideas, giving proper credit as mentioned above.
For me, I like to have the photo of the card idea close by, so I color print out the ones I really like by inserting them into a Word document. Following printing I cut the ideas apart and put them inside the matching stamp case. When I’m feeling like making a card, I already have my “research” done with those images handy inside the stamp case. It helps me to create a little faster that way.
Maybe you are the kind of card maker who likes to make two of each design they make. One to keep in a card idea library (with measurements on a post it note) and one to send/give out. If you are this type of card maker you will definitely be able to see your growth as a card maker and build your confidence in being better able to make cards that POP!
It is okay to CASE (Copy and Share Everything)! If you see an idea from one of the many global Stampin’ Up! Independent Demonstrators, it is perfectly alright to CASE their card. If you do post your finished creation on line it is nice to give them credit for their inspiration. It is also just fine to CASE a card idea from any of the Stampin’ Up! catalogs you may have access to.
Imagine, Think, and Plan
What kind of card do you need? What kind of card do you want to make? Do you have a special person in mind? What does the special person like? Tailor your card designs to suit the recipient’s preferences or interests. Customizing cards adds a personal touch that is deeply appreciated.
Start with selecting the stamp set(s). Sometimes you need multiples due to one set having the perfect image and another set have the perfect words you want.
When you start imagining the card you want to make, and after you’ve selected the stamp set(s) you plan to use, there is still more to consider.
Prioritize efficient crafting by planning your projects and setting a realistic timeframe. Improving your card making is about enjoying the process without feeling rushed. Think about how much time do you have to create? Do you want to make that card in one sitting? Or does your crafting space allow you to leave the project “in process” for awhile and come back to it later? Or are you feeling pressured because that needed occasion is coming up quickly, and you have procrastinated?
A simple solution if you have procrastinated is to make a previous design that you have made before and thought looked good. Make a small change like a bow, bling, or another color layer. Most likely your recipient for won’t ever know you’ve done something similar before. You will have taken the pressure off yourself and they will just be touched that you have created something special for them.
If you are planning ahead and have time, try to be original by sketching out your own card layout idea, then let it sit overnight to “marinate” in your brain. The next day you may make a tweak here or there to the sketch. Or pull out that photo you snapped of an idea, or visit your computer files of saved ideas.
After you have the card design in mind, explore color combinations. Pull out cardstock scraps of the colors you think would look good in the card and see if they really do go together. Mix and match until you are happy. Did you know Stampin’ Up! has a Color Coach you can use to select a guaranteed compatible trio of colors? Sometimes you can let the color combination “marinate” for awhile too. It never hurts to take a step back from your work surface and get a different perspective on the colors look from farther away.
Be Organized
Once you have settled on the stamp set, card design and color scheme, it is time to gather up all the remaining needed supplies. Use a shoebox size plastic tub, or a gallon size baggie to put your supplies in for easy reach during card construction. Even during the actual making process you still may decide to change something in the layout or materials. For me, I have found there will be times where I am playing with the supplies or colors and all of a sudden, my brain says “This is the One! Go for it! I hope you find that happens to you as well.
Make sure you have enough supplies to complete the card project. Or be okay that you have to modify your idea with the supplies you do have on hand. You might be surprised your new version might be better than what you thought of in the first place.
After all this imagining, thinking, and planning, it is time to actually make the card. But remember, savor the journey and not worry about achieving perfection. Embrace imperfections and delight in the joy of creating.
Be Neat
Start with a clean workspace and use a fresh piece of grid paper. You don’t want any previous adhesive residue to get on your project before even starting! Or if you are using recycled grid paper, make sure you have a rubber adhesive remover to take up those little bits of adhesive still stuck to your grid paper.
If you have enough clear acrylic stamp blocks, mount all the stamps you plan to use on the blocks, so you won’t have to be changing stamps on and off the blocks and potentially getting ink on your fingers.
Open and close the ink pads carefully without getting ink on your fingers, which you might transfer to your project without you realizing it happened. One way to help yourself not get ink on your hands or fingers is to wax the inner track of the ink cases with a birthday candle, so they will slide open and closed more easily.
Enjoy the quiet time you have to create. Or put some soft music on Spotify to play in the background. Or if you are spiritual, pray for your recipient during this time. Your creative process can be very good self-care. When the card is finished just the way you want it, say something positive to yourself as a compliment or give yourself some praise at how beautiful the project turned out.
Do Your Clean Up
Many of us don’t love the clean up process, but it is always a good idea to clean up your work surface and put your supplies, scraps, tools and whatever else you have out away immediately after finishing your project. I have read more than one Facebook post by other card makers asking for help to identify what stamp or die went with what set, because they haven’t cleaned up and put things away when they were finished.
By doing this you will be so glad when the time comes for another project to begin. You will have a fresh start all ready to go for next time.
MAKE YOUR CARDS POP! HOW WILL I KNOW?
Crisp and Clean Stamped Images and Words
Stamp your images with a light tap, tap, tap on the ink pad. Do not do a smash, smash, smash, like you used to do when you were a kid. Too much ink on the stamp or block edges can create “halos” which look awful. Your card will not “pop” with a halo. Sorry, that’s the truth. Do not be satisfied with any halos showing. Getting a halo usually means you have to start your project over.
I highly recommend that after you have tapped, tapped, tapped the ink pad to turn your stamp and block over to see that you have adequate ink coverage on the stamp. By doing this trick, you are guaranteed more success when stamping your images. You will also have a chance to wipe off any excess ink on the block with a facial tissue before you actually stamp it down. Don’t worry about your ink drying up quickly on the stamp when you have to wipe excess ink off a clear block. Just give your stamp a little “breath of life” by exhaling your lungs and there will be enough moisture from your breath to have the image stamp well.
Don’t Rock Your Block!
Have you heard the term don’t rock the block? That means to apply even pressure downward without rocking the block back and forth, or side to side at all. Hold the block in place for a count of 1, 2, 3 so the ink has a chance to transfer from the stamp to the paper, and then lift up. If your ink pad had enough ink in it, your result should be a solid, crisp, stamped image.
Juicy, But Not Soggy Pads
If your ink pad needs to be reinked, your stamped image will show light and dark areas on the finished image. Your word stamps will have uneven line thickness. This means you need to re-ink your ink pad.
Reinking your ink pad means putting maybe a dozen drops of the matching reinker on the surface of the ink pad. With the nozzle/tip of the reinker push the ink into the foam. Use a facial tissue to wipe the tip of the refill before you recap the bottle. On a scrap piece of grid paper ink up your stamp and test your image to see if you have achieved a crisp and solid inked image. If your image still looks spotty on your grid paper, then add a few more drops like before. Then repeat the process until perfection is achieved. (I’m kidding on the perfection part, but until it looks good to you.)
Stampin’ Up!s ink case design is really brilliant. When you close it, the inkpad is being stored upside down on the lid. The ink stays at the surface of the foam pad which helps the pad be ready for the next use.
I have found that the newer foam ink pads from Stampin’ Up! do tend to need to be reinked more often than previous versions of their pads.
On the other end of the ink spectrum, if you open your ink pad and you see bubbles or ink oozing onto the case, that means the stamp pad is over inked and you need to wipe up the excess with a facial tissue. You may even have to fold a paper towel and blot gently all over the surface of the foam to remove some ink. Then do some practice stamping on your grid paper until you see you have a quality stamped image.
On rare occasions, you may see a weird looking foam surface that presents itself. Usually that means the foam is disintegrating or there is a chemical reaction happening between the ink formula and the foam, either way the pad needs to be replaced.
The Wonderful World of Color
Have you tried playing with color? There are so many ways color can be used to make your card POP! There are many more ways than I can list here. These tips are a good place to start upping your creativity!
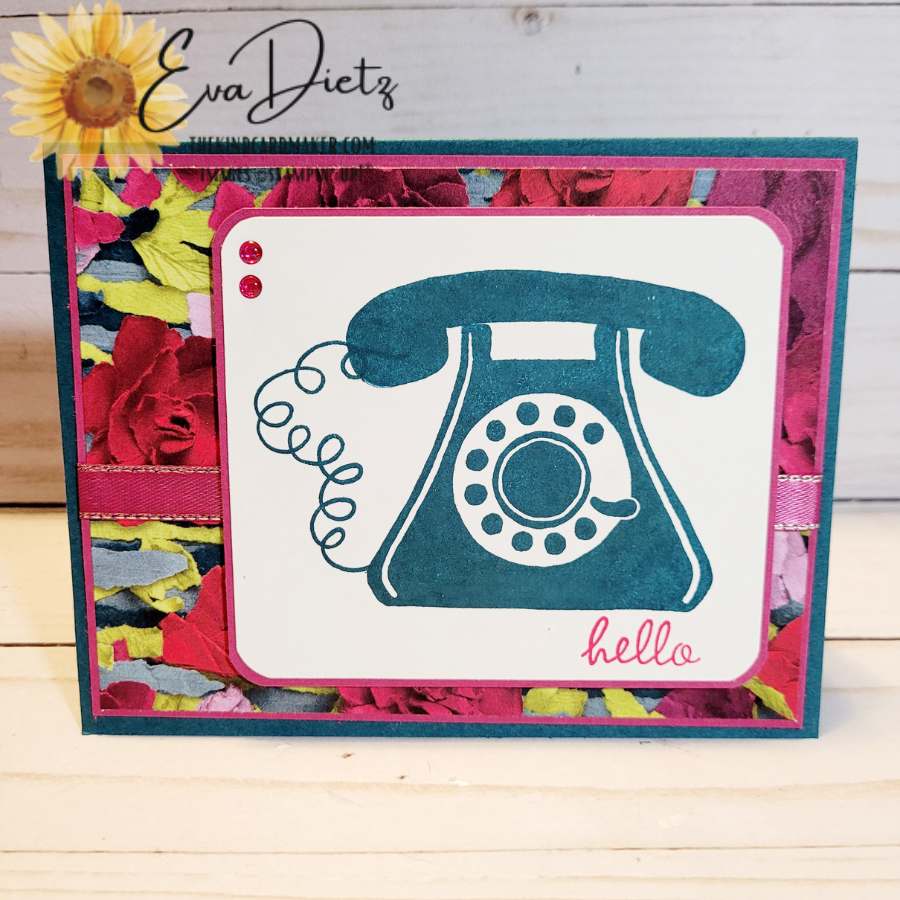
You can start with adding an accent color, such as added red to a black and white card design. The red can be in the form of a red layer of cardstock on the card. Or a scribble with a red alcohol marker and then stamp a black ink word on top. Or it can be a repeated pattern of a stamped image with only one of the repeated images colored in red. The addition of one color to a black and white design can be very striking.
You can try some hand coloring with a variety of coloring tools. There are colored pencils, watercolor pencils, skinny markers, thick markers, alcohol markers, painting with ink, painting with watercolors, and many shades of alcohol markers. All these methods can color in a stamped image depending on the water and ink you used. I would recommend that you practice well before the first time you want to add one of these coloring tools to your card design. There are plenty of YouTube videos to research to learn how to improve your coloring so that you blend the colors well.
Another way to use color well is to color an image with multiple Stampin’ Write markers on the actual red rubber cling stamps. Then give the stamp the “breath of life” and press well to your cardstock. So for example, if you had a sunflower flower stamp, the stem could be colored green, the petals yellow, and the flower center brown.
But instead of coloring the stamp with markers, you could use several colors of cardstock and stamp the same image in black ink repeated on each color of cardstock, then use your paper snips to carefully cut out the pieces and reassemble (like a puzzle) into one completed image.
Fancy Papers
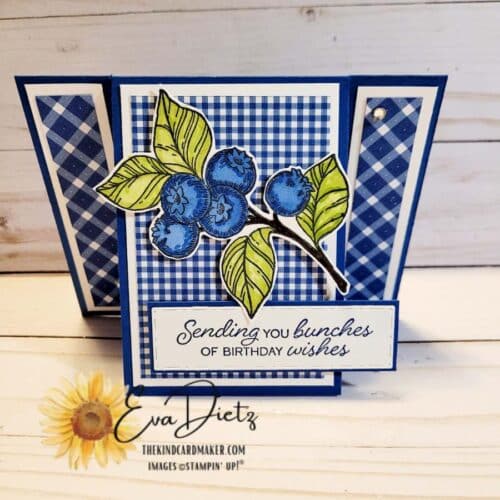
Stampin’ Up! creates some drop-dead gorgeous Designer Series Paper, which is double-sided quality paper to use in your card making. Using their patterned papers can give your card all the pop it needs in one easy layer, depending on what you choose. These packages of designer paper are color-coordinated and complement each other with their artwork and patterns, so you can be confident to use them in your card designs.
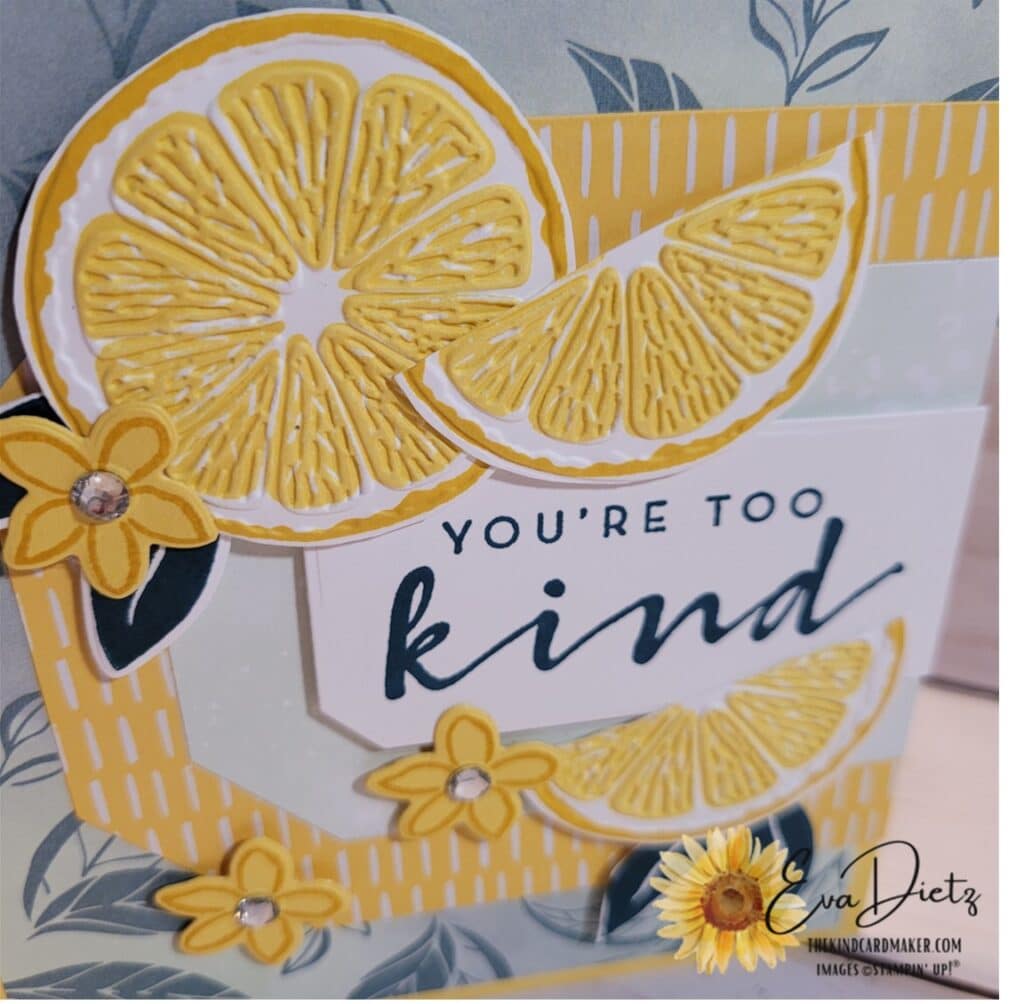
Other fancy papers, like patterned vellum, foils, glimmer paper can all add a bit of pop to a card whether it is a small accent piece or a layer. What you have to be careful of, is to not go crazy with all the choices. Just choose one fancy paper, or at the most two and your card will look great.
These “pretty” paper choices can add depth and interest to your cards without too much extra crafting effort.
Embellish Lightly
Every card needs a little bling in my opinion. Using embellishments is the way to go. Consider using die-cut shapes, ribbon. baker’s twine, sequins and other “gems”. These elements can elevate your card design without the fuss. However, do not go crazy with too much. One piece of ribbon and a bow plus a trio of rhinestones is enough. When you use embellishments like the sequins or gems, always place an odd number of them as that is more pleasing to the eye.
ENJOY THE PROCESS!
As you explore each of the steps mentioned above, I hope you’ll take time to be easy on yourself. Strive to grow your card making skills until you have cards that “POP” every time you complete one.


0 Comments